A summer AC tune up can make the difference between steady cooling and a system that struggles on the first hot afternoon. Before temperatures climb, take a few practical steps: replace a dirty air filter, clear leaves from around the outdoor unit, and check that supply vents are open. Small details matter. A mat of grass clippings near the condenser can restrict airflow, while a clogged filter may leave rooms feeling stuffy. These checks are useful, but they do not replace a professional inspection.
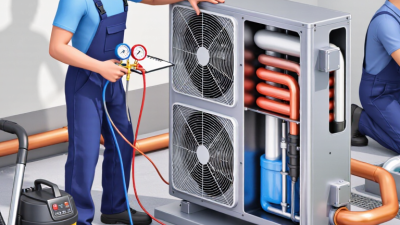
This guide explains how to approach a summer ac tune up safely and what to leave to a qualified HVAC technician. You can check thermostat settings, look for visible debris, and note unusual noises or weak airflow. Turn the system off before cleaning accessible areas, and follow the manufacturer’s instructions. Never remove electrical panels or handle refrigerant; those jobs require proper training and equipment. A technician can inspect electrical connections, measure system performance, and identify drainage or coil problems that a homeowner may miss. It is easy to assume a unit is fine when it still blows cool air. That assumption can be wrong. A simple checklist helps, though it cannot diagnose every fault. With careful preparation and timely professional service, your AC is better positioned to handle the season’s heat.

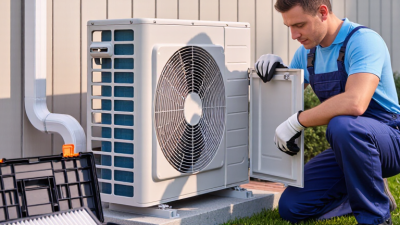
Before summer heat settles in, prepare the system with the power off. Switch off the thermostat and the outdoor-unit breaker before removing the access panel. Power off. Clear leaves and grass from around the condenser, and keep the airflow space recommended in the unit’s manual. Check the filter’s size and airflow arrow before replacing it. The U.S. Department of Energy says replacing a dirty, clogged filter with a clean one can reduce an air conditioner’s energy use by 5% to 15%. A small filter can matter.
Tips: Look for frayed wires, loose insulation, or water near the indoor unit, but do not open electrical compartments. Capacitors can hold a charge after power is disconnected. No guesswork. If you see damage, smell burning, or feel unsure, leave the system off and call a qualified technician. Do not handle refrigerant yourself.
After restoring power, set the thermostat to cooling and listen for unusual rattling or buzzing. Check that air flows from the vents and that the condensate drain is not dripping onto the floor. I’m tempted to call a quick rinse “maintenance,” but it cannot reveal hidden electrical or refrigerant problems. Record odd sounds and repeat them for the technician; details help.
Before summer heat settles in, check the air filter with the system switched off. A clogged filter can restrict airflow and make cooling less even.
Look for dust packed into the pleats, gray discoloration, or debris along the frame. A little dust is normal. A thick layer is not.
Check the filter’s size and airflow arrow before replacing it; the arrow should point toward the indoor unit. I still check twice, because the printing can be easy to miss. Use the size printed on the frame, not a guess based on the opening.
If you have a reusable filter, clean it according to its instructions and let it dry completely before reinstalling it. A damp filter can cause problems.
Avoid forcing a filter into place or leaving gaps around its edges, since air may bypass it.
How often it needs attention depends on household conditions, pets, and system use, so inspect it monthly during heavy cooling. If a clean filter does not improve weak airflow, there may be another issue worth having a qualified technician assess.
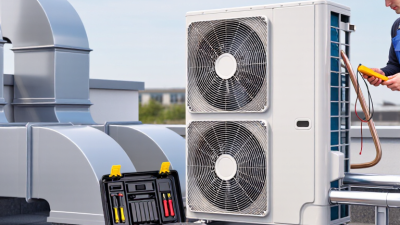
A summer tune-up can begin with a careful look around the outdoor condenser. Turn off power at the outdoor disconnect or breaker before clearing debris. Remove leaves, grass clippings, and twigs by hand, keeping fingers away from the metal fins. A small broom works well on the pad and nearby ground. A little patience helps.
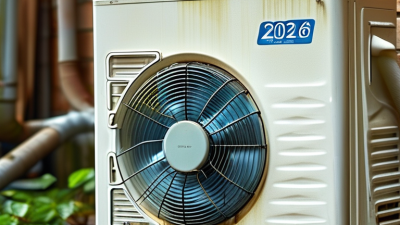
Trim plants so air can move freely around the unit. Many systems need about two feet of open space, but check your equipment manual for its required clearance. Move bins, hoses, and patio furniture away from the sides. Look for cottonwood fluff or dry leaves packed against the coil. They can restrict airflow, even when the top looks clear. Avoid pulling debris through the fins; they bend easily.
If the coil looks dusty, rinse its exterior gently with a garden hose after power is off. Do not use a pressure washer, harsh chemicals, or a strong spray. Keep water away from electrical components, and do not remove access panels. Bent fins or heavy buildup may need professional attention. I once assumed a quick rinse would solve everything; it did not clear debris lodged deep inside. Stop if the unit looks damaged or you are unsure.
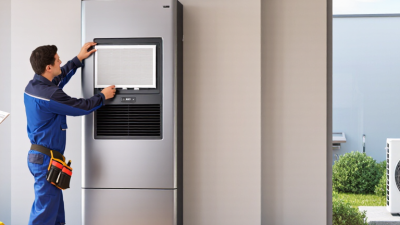
Before the first hot spell, inspect the condensate drain near the indoor unit. Turn off cooling, then look for standing water in the drain pan, damp insulation, or a visible slime plug at the pipe outlet. A clear drain should carry water away steadily while the system runs. Small check. Worth doing. If water is pooling or the line repeatedly clogs, stop and ask a qualified HVAC technician to clear it; recurring blockage can point to a deeper drainage or installation issue. It is easy to overlook this quiet pipe until a ceiling stain appears.
Then check the thermostat’s mode, schedule, and temperature reading. Set it to cooling, and compare its reading with a separate room thermometer placed away from sunlight and supply vents. If the readings differ noticeably, check placement and batteries before assuming the thermostat is faulty. The U.S. Department of Energy says setting a thermostat back 7–10°F for eight hours daily can save up to 10% a year on heating and cooling. In summer, use a higher setting while away, then choose a comfortable setting at home. Dropping it very low will not cool the house faster; that common assumption deserves a second look.
Set the thermostat several degrees below the room temperature and let the system run for about 15 minutes. Keep doors and windows closed during the test. Place a thermometer near a return-air grille, then measure the air coming from a supply vent. A difference of roughly 15 to 20 degrees Fahrenheit can be typical, but humidity and operating conditions affect the reading. One measurement is only a clue.
Check whether the airflow feels steady in several rooms. Weak flow from one vent may point to a blocked grille or duct issue; weak flow everywhere can have other causes. Look at the filter for heavy dust, and inspect the outdoor unit from a safe distance. Clear away leaves, but do not open electrical panels. Listen for repeated clicking, rattling, or a new high-pitched sound. Notice musty odors, water around the indoor unit, or cooling that starts and stops unusually often.
A cool vent does not always mean the system is working well. I still find temperature readings easy to overtrust. A thermometer placed in sunlight, or too close to a vent, can skew the result. Record the room temperature, vent reading, and run time, then compare them during another test. If cooling remains weak, ice appears on the refrigerant lines, or unusual noise continues, turn the system off and contact a qualified HVAC technician. Don’t scrape ice away; the cause may need professional diagnosis.
| Check | How to Test | Normal or Healthy Indication | Example Reading | Signs of Trouble |
|---|---|---|---|---|
| Thermostat and operating cycle | Set the system to Cool, lower the setpoint, and confirm the indoor blower and outdoor unit start. | The system starts after its normal delay and shuts off when the setpoint is reached. | Indoor temperature: 78°F; setpoint: 74°F; cooling starts. | No start, repeated short cycling, unusual delays, or a room temperature that keeps rising. |
| Air filter and return airflow | Inspect the filter and make sure return grilles are open and unobstructed. Replace a dirty filter with the correct size and type. | Filter is clean enough for airflow; return grilles are clear. | Filter: clean, dry, and correctly fitted. | A heavily loaded filter, whistling returns, weak airflow, or ice on the indoor coil. Do not run the system with a frozen coil. |
| Supply-to-return temperature difference | After the system has run steadily for about 15 minutes, measure air near a return grille and a supply register with the same thermometer. | A temperature split of roughly 16–22°F is a common screening range under suitable conditions; equipment and humidity affect the result. | Return: 76°F; supply: 56°F; split: 20°F. | A repeatedly very small or unusually large split may indicate airflow, coil, refrigerant, or measurement issues; arrange a professional diagnosis. |
| Supply airflow at registers | Check several registers by hand for steady airflow and confirm supply grilles are open. | Airflow is reasonably consistent from room to room, allowing for normal duct-system differences. | Living room and bedroom registers both deliver steady cool air. | One room has little or no airflow, or several registers feel weak. Check for blocked grilles; a technician can inspect ducts and blower performance. |
| Outdoor unit and coil area | With power safely off, clear loose leaves and debris around the unit. Keep plants and stored items away from the airflow path. | Coil surface is not covered by debris; the fan runs smoothly and exhausts warm air during cooling. | Clear space around the unit; no visible debris blocking the coil. | Fan does not run, the unit vibrates or makes grinding noises, or the coil is badly clogged. Do not open electrical panels or use high-pressure water on the coil. |
| Condensate drain and indoor humidity clues | Look for water around the indoor unit and check that the visible drain outlet is not overflowing. | No water is pooling near the air handler; condensate drains away during humid weather. | Drain outlet is clear; floor around the unit is dry. | Water leaks, musty odors, or persistently clammy rooms may indicate a blocked drain or a cooling/dehumidification problem. |
| Operating sounds and odors | Listen during startup and steady operation from a safe distance; note any new smells. | A consistent airflow sound and normal compressor operation, without persistent unusual odors. | No new rattling, buzzing, or burning odor during a cooling cycle. | Burning smells, loud buzzing, repeated clicking, or metal-on-metal noise warrant shutting the system off and contacting a qualified technician. |
| Cooling consistency | Compare room comfort and thermostat readings after the system has run continuously for a while, accounting for outdoor heat and sun exposure. | Indoor temperature trends toward the setpoint and rooms feel reasonably comfortable. | Temperature falls from 78°F toward a 74°F setpoint over the cooling cycle. | The system runs continuously without cooling, struggles to maintain temperature, or has large room-to-room comfort differences. |
| Note: Temperature splits are screening guidance, not a universal pass/fail specification. Outdoor temperature, indoor humidity, airflow, system design, and manufacturer requirements affect readings. Refrigerant checks, electrical repairs, and sealed-system work should be handled by a qualified HVAC professional. | ||||