10 Summer AC Tune Up Tips for Better Cooling?

When summer heat settles over the neighborhood, an air conditioner has little time to recover between long afternoons. A summer ac tune up can help reveal restricted airflow, dirty coils, loose electrical connections, or a clogged condensate drain before small problems become urgent. The U.S. Department of Energy reports that air conditioning uses about 6% of all electricity produced in the United States, costing homeowners roughly $29 billion each year. That figure makes routine care worth considering, though a tune-up cannot promise lower bills or prevent every breakdown.

“Airflow is king,” says Bryan Orr, an HVAC educator and contractor whose HVAC School resources focus on practical system performance. It is a useful reminder: even a well-running outdoor unit can struggle when its filter is packed with dust or supply vents are blocked by furniture. ENERGY STAR recommends annual pre-season checkups by a qualified technician, alongside regular filter care. Small steps matter. So does good judgment. A service visit is not magic, and an older system may still cool unevenly after maintenance. Still, checking the filter, clearing debris around the outdoor unit, and scheduling a professional inspection before peak heat can give a system a better chance to keep rooms comfortable. The following tips focus on those practical checks—and on knowing when a problem needs a trained technician.
10 Summer AC Tune Up Tips for Better Cooling?

Prepare the AC System and Clean or Replace Its Air Filter

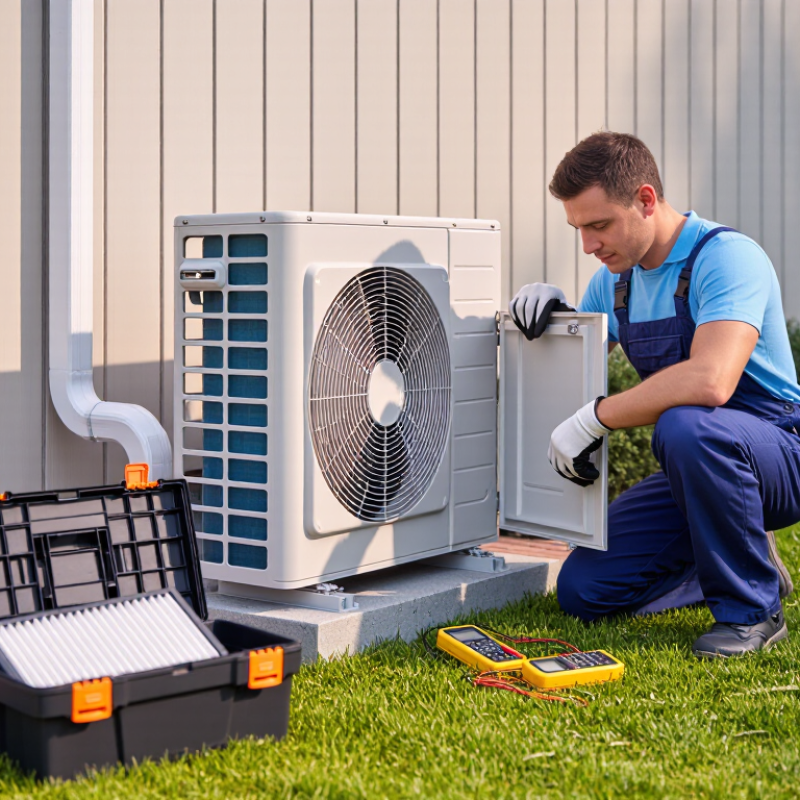
Before summer heat settles in, make room around the outdoor unit. Remove leaves, grass clippings, and other loose debris from the grille, keeping plants trimmed back. Don’t open electrical panels or spray water into the unit. A clear area helps airflow, but it cannot fix every cooling problem.

Turn the system off before accessing its filter, and check the owner’s manual for the correct size and replacement schedule. Slide the filter out carefully. If it is disposable, replace it with one that matches the listed dimensions and airflow direction. For a washable filter, rinse it as directed and let it dry completely before reinstalling. Never run the system with a wet or missing filter. Small detail. It matters.

Hold the filter up to a light. If dust blocks much of the surface, airflow may already be restricted. I’ve seen homeowners focus on the thermostat while overlooking a packed filter; it’s an easy miss, even with a regular routine. Check it monthly during heavy use, though dust and pets can mean more frequent changes. If a clean filter doesn’t improve airflow, or ice forms on the indoor coil, switch the system off and arrange a qualified inspection rather than guessing at the cause.

Clear the Outdoor Unit and Remove Nearby Debris

Before cleaning the outdoor unit, switch off power at the thermostat and the unit’s disconnect. Check your equipment manual if you are unsure how to do this safely. Remove leaves, grass clippings, and loose twigs from around the cabinet. Aim for the clearance specified by the manufacturer; many units need roughly two feet of open space, but requirements vary. Small details matter. A hedge that looks harmless in spring can crowd the coil by midsummer.

I used to think clearing the top was enough. It wasn’t: windblown cottonwood fluff and dry leaves can collect along the sides, restricting airflow. Pick away loose debris by hand, then rinse the exterior coil gently with a garden hose. Do not use a pressure washer; its force can bend delicate fins. Keep the spray straight and moderate, and avoid electrical components. If the fins look crushed or the coil is heavily packed with dirt, stop and arrange professional service rather than taking the cabinet apart. Go gently. Afterward, check that plants, bins, and stored tools have not drifted back into the airflow path. One thing I still forget: grass grows quickly after mowing, so this check may need repeating during the cooling season.

Inspect Coils, Condensate Lines, and Indoor Vents

A summer AC tune-up should include more than a quick thermostat check. Start with the outdoor condenser coil, where grass clippings, cottonwood fluff, and dust can restrict airflow. Turn off power before inspecting the unit. Clear loose debris by hand, and use a gentle stream of water if the coil needs cleaning. Avoid bending the thin fins. Indoor evaporator coils are harder to reach, so leave heavy buildup or damaged fins to a qualified technician.

Check the condensate drain line for standing water, slime, or a musty smell near the indoor unit. A blockage can cause water to back up into the drain pan. If your system has an accessible cleanout, follow the equipment instructions for clearing it; do not force tools into the pipe. Small details matter. A damp patch under the air handler is a warning, not just a housekeeping problem.

Walk through the rooms while the AC runs. Make sure supply vents are open and not hidden behind rugs, curtains, or furniture. Hold your hand near each grille and compare the airflow; one weak vent may point to a duct issue. Clean dusty grilles with a soft brush. It is easy to assume every vent is working because the system sounds normal, but sound alone tells you little. If airflow stays uneven after clearing obstructions, arrange a professional inspection.

10 Summer AC Tune Up Tips for Better Cooling? — Inspect Coils, Condensate Lines, and Indoor Vents

# Tune-Up Task When to Check What to Do Cooling Benefit Safety Notes
1 Check the air filter Monthly during heavy use; replace as needed Inspect for dust and follow the system’s instructions for filter size, type, and replacement interval. A clean, correctly sized filter helps maintain airflow and can reduce strain on the system. Turn the system off before removing the filter, and install it in the direction shown by its airflow arrow.
2 Clear the outdoor unit Before the cooling season and after yard work Remove leaves, grass, and other loose debris around the unit. Keep plants and objects clear according to the manufacturer’s required spacing. Unblocked airflow allows the outdoor unit to release heat more effectively. Do not open electrical panels or reach into the unit. Switch off power before cleaning nearby areas.
3 Inspect the outdoor coil At the start of summer and after storms or landscaping Look for visible dirt, lint, or plant material on the coil. If rinsing is appropriate for the equipment, use gentle water pressure and follow the manufacturer’s instructions. A cleaner coil can transfer heat more effectively and support normal operation. Coil fins bend easily. Avoid pressure washers, harsh chemicals, and contact with wiring; have heavy buildup cleaned by a qualified technician.
4 Check the indoor coil area During routine maintenance or if airflow or cooling declines Look for visible dust, water, or ice near the indoor air handler. Arrange professional inspection if the coil is dirty or access requires removing panels. A clean indoor coil helps air move across the heat-transfer surface. Do not touch coil fins or internal components. Turn off the system and call a technician if you see ice or persistent water.
5 Inspect the condensate drain and pan Monthly during humid weather Check for standing water, leaks, or visible blockage around the indoor unit and drain outlet. Use only cleaning methods approved for the system. A clear drain helps remove moisture produced during cooling and reduces the risk of overflow. Do not mix drain cleaners or pour chemicals into the line without manufacturer approval. Seek service for repeated clogs or leaks.
6 Keep indoor vents unobstructed Weekly and whenever furniture is rearranged Move rugs, curtains, furniture, and other items away from supply registers and return-air grilles. Dust vent surfaces as needed. Open pathways support more even airflow through the home. Do not close many vents to force more air into other rooms; this can affect system airflow.
7 Use the thermostat settings consistently At the beginning of the season and after schedule changes Confirm the system is set to cooling and choose a comfortable setting. Use a schedule or a modest adjustment when the home is unoccupied. A suitable schedule can reduce unnecessary runtime while maintaining comfort. Avoid frequent large temperature changes; the thermostat does not make the system cool faster when set far below the desired temperature.
8 Check accessible ductwork Seasonally and if a room has weak airflow Look for loose connections, crushed flexible ducts, or damaged insulation in accessible areas such as an attic or utility room. Repairing leaks or restrictions may help deliver cooled air where it is needed. Do not enter unsafe or unfinished areas. Duct sealing and repairs may require a qualified professional.
9 Reduce heat entering the home During sunny or especially hot periods Close blinds or shades on sun-exposed windows and use exterior shading where practical. Limiting solar heat gain can help rooms stay more comfortable and reduce cooling demand. Keep window coverings clear of heaters, candles, and other heat sources.
10 Schedule a professional system check Before peak summer use, or when performance changes Ask a qualified HVAC technician to inspect system operation, electrical components, refrigerant-related issues, and parts that require specialized tools. A professional check can identify problems that visual household inspections may miss. Refrigerant handling and electrical repairs should be performed by qualified professionals.

Note: Follow the equipment manufacturer’s maintenance instructions. Turn off power before basic cleaning near the system, and contact a qualified technician for electrical issues, refrigerant concerns, persistent leaks, unusual noises, or ice on the equipment.

Check Thermostat Settings, Airflow, and Cooling Performance

Set the thermostat to Cool and choose a steady, comfortable temperature. Check that the fan is set to Auto, not On, if you want it to stop between cooling cycles. Avoid turning the setting way down; it will not make the system cool faster. Small changes help. A fresh filter can improve airflow, so check it monthly during heavy use and replace it when dirty. Note the date, too. I sometimes forget.

Walk through the rooms and make sure return grilles are not blocked by rugs or furniture. Keep supply vents open, even in unused rooms, and listen for weak airflow or rattling. Clear leaves and grass from around the outdoor unit, leaving open space for air to move. Do not open electrical panels or handle refrigerant. That is not a routine homeowner check.

Look for water near the indoor unit and check the visible drain outlet for signs of a clog. On a warm afternoon, compare the air at a supply vent with the room air; it should feel distinctly cooler, though one reading cannot diagnose a fault. If cooling stays weak, airflow drops, or the system runs constantly, record the thermostat setting and symptoms. A qualified technician can inspect the coil, drain, and refrigerant safely. Sometimes the issue is less obvious.

Review Electrical Components and Arrange Professional Maintenance

Before the first heat wave, look over the AC’s electrical parts without opening its cabinet. Check for frayed wiring, scorch marks, rust, or a damaged outdoor disconnect. Keep plants and stored items clear of the unit. A quick visual check is easy to overtrust. Hidden faults need proper testing.

The U.S. Department of Energy reports that replacing a dirty air-conditioner filter can reduce cooling-system energy use by 5% to 15%. That helps, but it cannot fix a weak capacitor or a loose connection. Leave electrical repairs to a qualified technician. Do not touch exposed wires or remove access panels.

ENERGY STAR recommends annual pre-season professional maintenance. Ask the technician to inspect wiring and terminals, test capacitors and contactors, and measure voltage and current against the equipment’s specifications. They should also check refrigerant, airflow, and the condensate drain. These checks can catch trouble before the house stops cooling. Still, maintenance cannot promise a breakdown-free summer; age, heavy use, and neglected repairs matter too. Keep the service record, including readings and parts replaced, so future visits have useful context.